

Many of blogger blog holder's may have seen the latest blogger hack in many of the professional blogger blog's that is the animated tagg cloud.In these post i will explain how to install such animated tagg cloud in your blogger blog.
These widget is known as blogumus it was an original plugin of word press blog which has been converted for blogger blog by roy tank.One thing should be noted that it's an flash based widget so it may e not search engine friendly.
Follow below step's to instal animated tag cloud for blogger blog knwon as blogumus:
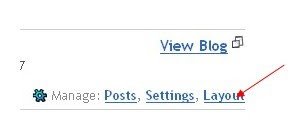
Step 1: Sign into blogger.com then open your blog and click on layout tab, as below.
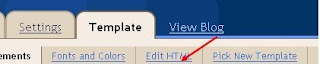
 Step 3: now when you have reached the layout tab click on edit html tab there, as shown below.
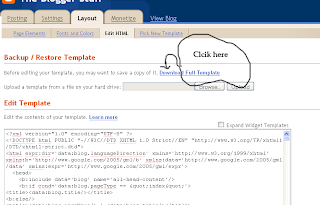
 Step 4: It's not actually important to follow but if you are an beginner then it's really important for you to follow these step.
Click on download full template option there to back up your template so that if any thing goes wrong then you can upload your template back.
 Step 5: Find using ctrl + f <b:section class='sidebar' id='sidebar' preferred='yes'>
Step 6: Immediately after the above code paste the below code:
<b:widget id='Label99' locked='false' title='Labels' type='Label'>
<b:includable id='main'>
<b:if cond='data:title'>
<h2><data:title/></h2>
</b:if>
<div class='widget-content'>
<script src='http://halotemplates.s3.amazonaws.com/wp-cumulus-example/swfobject.js' type='text/javascript'/>
<div id='flashcontent'>Blogumulus by <a href='http://www.roytanck.com/'>Roy Tanck</a> and <a href='http://www.bloggerbuster.com'>Amanda Fazani</a> via <a href='http://bloggerstop.net'>BloggerStop.Net</a></div>
<script type='text/javascript'>
var so = new SWFObject("http://halotemplates.s3.amazonaws.com/wp-cumulus-example/tagcloud.swf", "tagcloud", "240", "300", "7", "#ffffff");
// uncomment next line to enable transparency
//so.addParam("wmode", "transparent");
so.addVariable("tcolor", "0x333333");
so.addVariable("mode", "tags");
so.addVariable("distr", "true");
so.addVariable("tspeed", "100");
so.addVariable("tagcloud", "<tags><b:loop values='data:labels' var='label'><a expr:href='data:label.url' style='12'><data:label.name/></a></b:loop></tags>");
so.addParam("allowScriptAccess", "always");
so.write("flashcontent");
</script>
<b:include name='quickedit'/>
</div>
</b:includable>
</b:widget>
that's it if everything had been done properly then you will see the animated tagg cloud widget in your blogger blog else you should start again from step 1.
Note:
You can change the position of the animated tag cloud position your blog by loging into layout and selecting page element there you can change the animated tagg cloud position in your blogger blog.
if you have any doubt then please comment it below.
Read more »
These widget is known as blogumus it was an original plugin of word press blog which has been converted for blogger blog by roy tank.One thing should be noted that it's an flash based widget so it may e not search engine friendly.
Follow below step's to instal animated tag cloud for blogger blog knwon as blogumus:
Step 1: Sign into blogger.com then open your blog and click on layout tab, as below.
 Step 3: now when you have reached the layout tab click on edit html tab there, as shown below.
 Step 4: It's not actually important to follow but if you are an beginner then it's really important for you to follow these step.
Click on download full template option there to back up your template so that if any thing goes wrong then you can upload your template back.
 Step 5: Find using ctrl + f <b:section class='sidebar' id='sidebar' preferred='yes'>
Step 6: Immediately after the above code paste the below code:
<b:widget id='Label99' locked='false' title='Labels' type='Label'>
<b:includable id='main'>
<b:if cond='data:title'>
<h2><data:title/></h2>
</b:if>
<div class='widget-content'>
<script src='http://halotemplates.s3.amazonaws.com/wp-cumulus-example/swfobject.js' type='text/javascript'/>
<div id='flashcontent'>Blogumulus by <a href='http://www.roytanck.com/'>Roy Tanck</a> and <a href='http://www.bloggerbuster.com'>Amanda Fazani</a> via <a href='http://bloggerstop.net'>BloggerStop.Net</a></div>
<script type='text/javascript'>
var so = new SWFObject("http://halotemplates.s3.amazonaws.com/wp-cumulus-example/tagcloud.swf", "tagcloud", "240", "300", "7", "#ffffff");
// uncomment next line to enable transparency
//so.addParam("wmode", "transparent");
so.addVariable("tcolor", "0x333333");
so.addVariable("mode", "tags");
so.addVariable("distr", "true");
so.addVariable("tspeed", "100");
so.addVariable("tagcloud", "<tags><b:loop values='data:labels' var='label'><a expr:href='data:label.url' style='12'><data:label.name/></a></b:loop></tags>");
so.addParam("allowScriptAccess", "always");
so.write("flashcontent");
</script>
<b:include name='quickedit'/>
</div>
</b:includable>
</b:widget>
that's it if everything had been done properly then you will see the animated tagg cloud widget in your blogger blog else you should start again from step 1.
Note:
You can change the position of the animated tag cloud position your blog by loging into layout and selecting page element there you can change the animated tagg cloud position in your blogger blog.
if you have any doubt then please comment it below.


